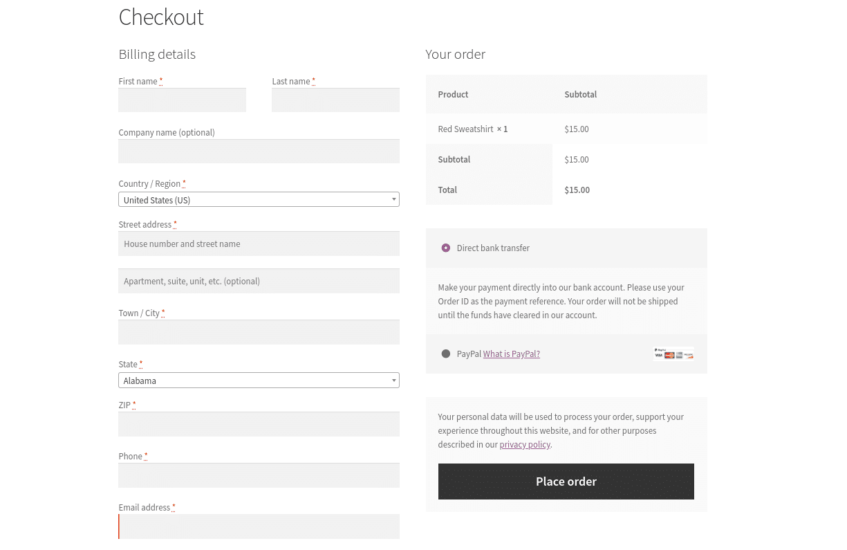
Let’s say you want to custom checkout field on WooCommerce checkout page without Plugin, to capture few extra details from your customer. For example, it might be a customer VAT number or a Company Name. In such cases there are many plugins available but problems with plugins are compatibility and Speed. So this blog help you to add custom checkout field using three step codes without any extra files or heavy css of separate plugins.
Table of Contents
Custom checkout fields which we creating using codes will show above the Checkout page order notes – right after the shipping form. It will feature a label, an input field and will be required, just like other fields of checkout page.

Where to add Custom Checkout Field custom code?
You should place custom PHP code in functions.php and custom CSS in style.css of your child theme
So, here’s step by step guide.
Step 1 : PHP Snippet : Add New Custom checkout Field @ WooCommerce Page
Here we display the new VAT field on the WooCommerce Checkout page above the “Order Notes” box
The new field ID is “TAX_no“, which will be useful to remember in Step 2 and 3.
/**
 * @snippet       Add Custom Field @ WooCommerce Checkout Page
 * @author        Scriptfeeds
 * @testedwith    WooCommerce 6.6
 * @community     https://scriptfeeds.com/
 */

add_action( 'woocommerce_before_order_notes', 'script_add_custom_checkout_field' );

function script_add_custom_checkout_field( $checkout ) {
   $current_user = wp_get_current_user();
   $saved_tax_no = $current_user->tax_no;
   woocommerce_form_field( 'tax_no', array(
      'type' => 'text',
      'class' => array( 'form-row-wide' ),
      'label' => 'BTW Number',
      'placeholder' => 'CA12345678',
      'required' => true,
      'default' => $saved_tax_no,
   ), $checkout->get_value( 'tax_no' ) );
}
Step 2 : Validation of Custom Field
To validate the fields, we will use “required” => true which means the field will have a required mark beside its label. But we also have to generate error message in case of empty field.
/**
 * @snippet       validating Custom Field
 * @author        Scriptfeeds
 * @testedwith    WooCommerce 6.6
 * @community     https://scriptfeeds.com
 */

add_action( 'woocommerce_checkout_process', 'script_validate_new_checkout_field' );

function script_validate_new_checkout_field() {
   if ( ! $_POST['tax_no'] ) {
      wc_add_notice( 'Please enter your TAX Number', 'error' );
   }
}
Step 3 : Saving and Display of Custom field at WooCommerce Thank You Page, Order Page & Emails
After custom fields validation, order will be processes in WooCommerce. But to display custom fields value in orders and emails we need a function to display and save. Use below code to do the same.
/**
 * @snippet       Display of Custom Field
 * @author        Scriptfeeds
 * @testedwith    WooCommerce 6.6
 * @community     https://scriptfeeds.com
 */

add_action( 'woocommerce_checkout_update_order_meta', 'script_save_new_checkout_field' );

function script_save_new_checkout_field( $order_id ) {
    if ( $_POST['tax_no'] ) update_post_meta( $order_id, '_tax_no', esc_attr( $_POST['tax_no'] ) );
}

add_action( 'woocommerce_thankyou', 'script_show_new_checkout_field_thankyou' );

function script_show_new_checkout_field_thankyou( $order_id ) {
   if ( get_post_meta( $order_id, '_tax_no', true ) ) echo '<p><strong>Tax Number:</strong> ' . get_post_meta( $order_id, '_tax_no', true ) . '</p>';
}

add_action( 'woocommerce_admin_order_data_after_billing_address', 'script_show_new_checkout_field_order' );

function script_show_new_checkout_field_order( $order ) {
   $order_id = $order->get_id();
   if ( get_post_meta( $order_id, '_tax_no', true ) ) echo '<p><strong>Tax Number:</strong> ' . get_post_meta( $order_id, '_tax_no', true ) . '</p>';
}

add_action( 'woocommerce_email_after_order_table', 'script_show_new_checkout_field_emails', 20, 4 );

function script_show_new_checkout_field_emails( $order, $sent_to_admin, $plain_text, $email ) {
    if ( get_post_meta( $order->get_id(), '_tax_no', true ) ) echo '<p><strong>Tax Number:</strong> ' . get_post_meta( $order->get_id(), '_tax_no', true ) . '</p>';
}
So that’s all you need to do to add Custom field on WooCommerce checkout Page without any Plugin. We tested it with latest version of WooCommerce. Please give a try and let us know how it goes.
For anything else, connect with our team.

