This tutorial will help you to configure or add google workspace MX records to use Google Workspace (formerly G Suite) or Google Mail. To use google workspace we need to an active Google Workspace (G Suite) subscription.
Table of Contents
Below are the Google Workspace “MX records” which you have to add in cpanel
| Name/Host/Alias | Time to Live (TTL*) | Record Type | Priority | Value/Answer/Destination |
| @ or leave blank / domain name | 3600 or default(14400) | MX | 1 | ASPMX.L.GOOGLE.COM. |
| @ or leave blank / domain name | 3600 or default(14400) | MX | 5 | ALT1.ASPMX.L.GOOGLE.COM. |
| @ or leave blank / domain name | 3600 or default(14400) | MX | 5 | ALT2.ASPMX.L.GOOGLE.COM. |
| @ or leave blank / domain name | 3600 or default(14400) | MX | 10 | ALT3.ASPMX.L.GOOGLE.COM. |
| @ or leave blank / domain name | 3600 or default(14400) | MX | 10 | ALT4.ASPMX.L.GOOGLE.COM. |
Google workspace offers many services in which can be used to automate business requirements. Domain based Gmail service is one of them here we can login in Gmail with our domain based email and use features of a normal Gmail account.
This Article will help you to add google workspace MX records in cpanel if your domain is added in cpanel. Follow below steps to add Google MX records in Cpanel
Quick Steps for adding google workspace MX records
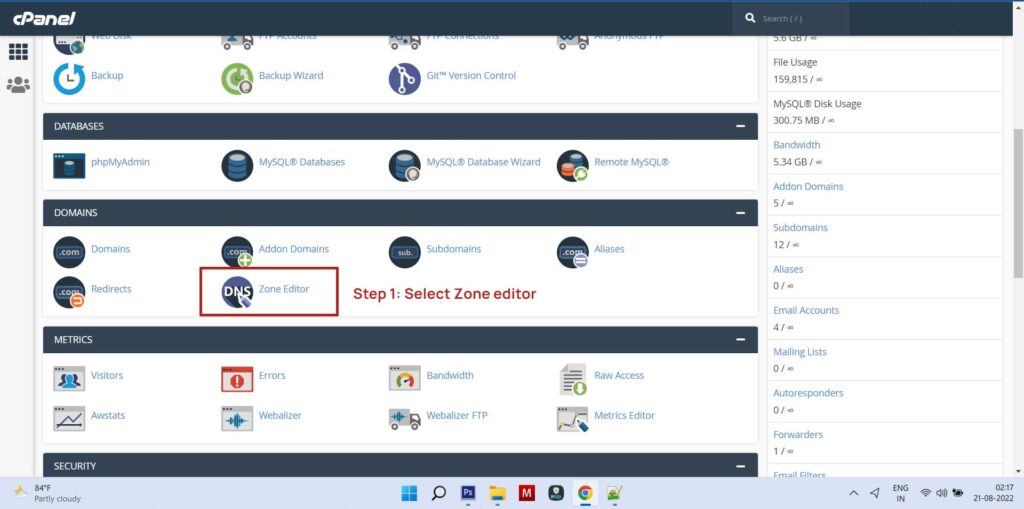
- Login to cPanel and click the Zone Editor icon option under Domain tab.
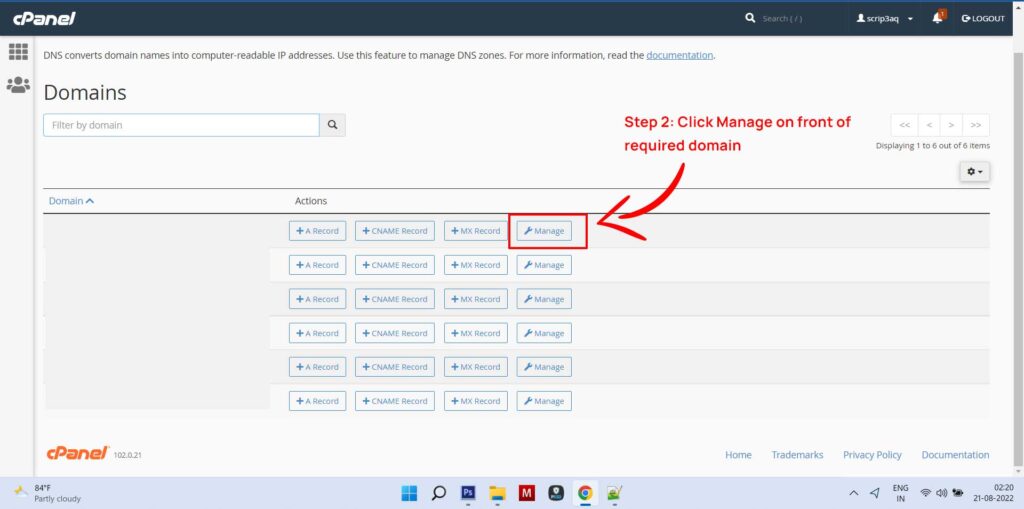
- Click Manage in front of required domain.
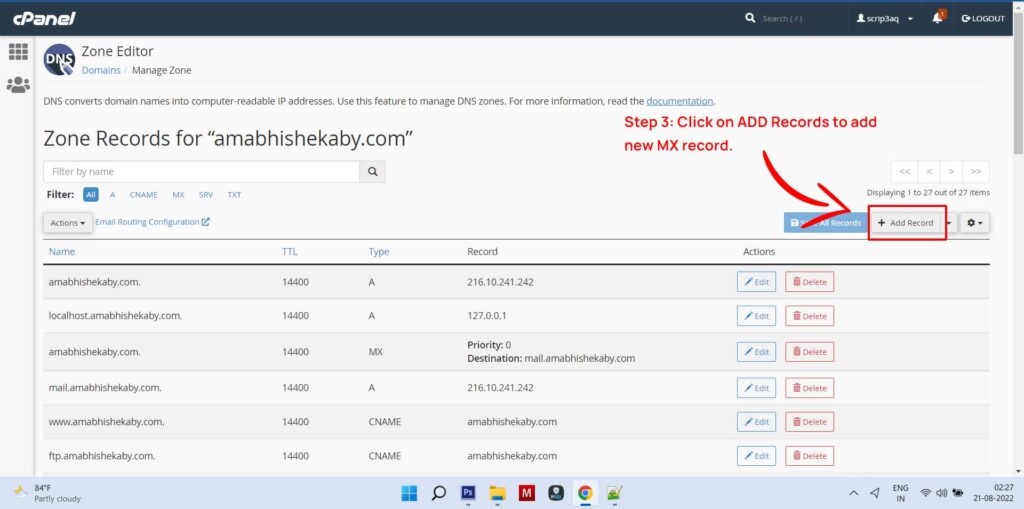
- Records list of domain open and click on ADD records option .
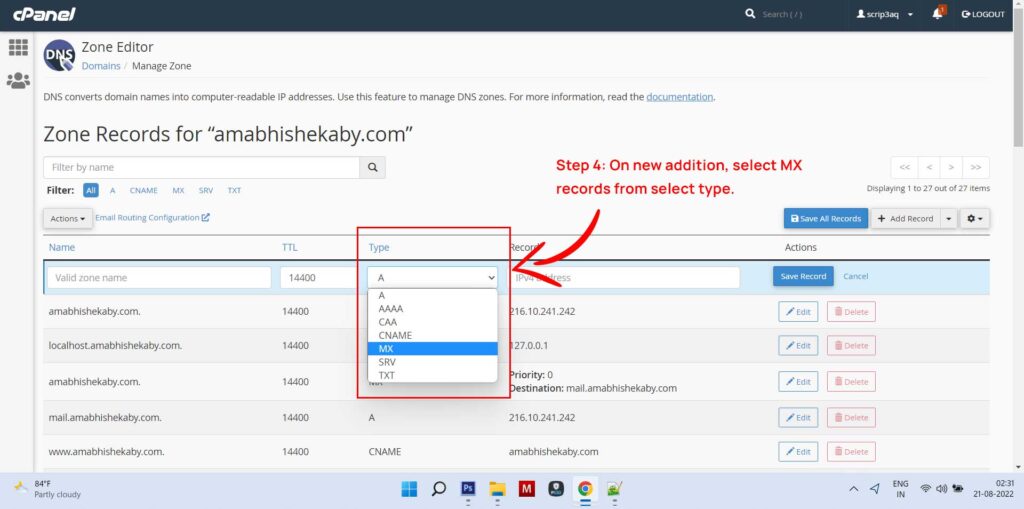
- New tab will be added in list. Select MX from select type option in type.
- Add other details in tabs as per the above Google MX records and click on save.
- Repeat same steps for all records.
- Once done, go back to google workspace dashboard verification.
Note : Once you add all MX records, Please delete the existing old MX record with priority 0. Keep the other data like TTL value (14400), Name default (@ or domainname.com.).
So that’s all for adding Google MX records. Let us know if you need any help in comment section or Hire us for your next project,